

")
If my ex-husband reads this article, he will laugh.
That’s because the premise sets me up as a photography expert. He is the true pro—a former National Geographic shooter—but still, I’ve come to realize that after 29 years of marriage, a bit of knowledge about what makes a good photo has rubbed off on me. Plus, I regularly comb through hundreds of photos taken by travelers on our trips.
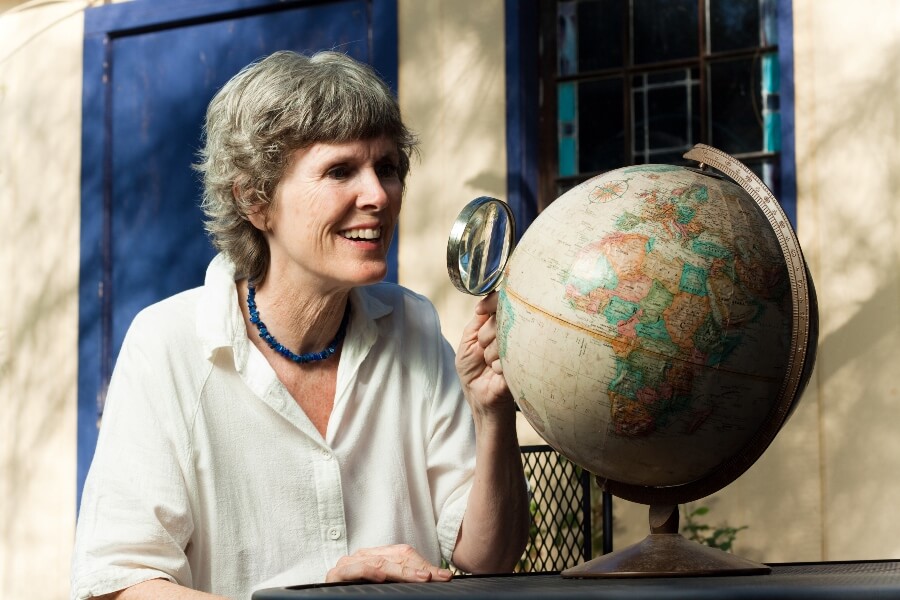
Jeannie Ralston has many more tips and examples and is happy to share them with you at a free virtual seminar, “How to Take Better Photos,” on Monday, April 7th. RSVP here.
In our social media age, taking good photos has never felt more important. You want to capture your friends’ attention, give them a sense of what made your trip so stunning, so moving. And in our smart-phone era, taking good photos has never been easier (luckily for us—and unluckily for professional photographers, some of whom have been nudged out of jobs).
Still, there are an awful lot of mediocre photos floating around Facebook and elsewhere. Here are some thoughts on how to make yours stand out. I don’t talk about technical aspects of the camera or adding filters and such afterward. These are ideas for you to get something great without too much downloading and fiddling.
1. You’re Not Just Documenting
A lot of photos I see seem to only work as a record of where someone went and what they did. Ugh. Fine to snap those, but keep them to yourself. They’re boring. When it comes to sharing, you want photos that convey an emotion or a feel for what you experienced. That takes more time and thought.
2. Work a Situation

“Snapshots” should be a bad word in your vocabulary if you truly care about your photos. Don’t settle for a quick click of a button. Look for the best angle, the best light, the most interesting background. Move people around. Move yourself around.
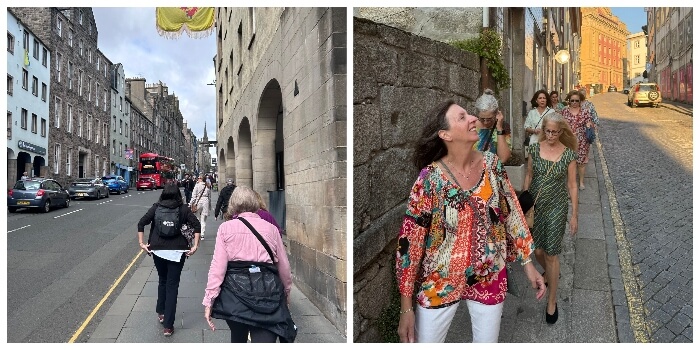
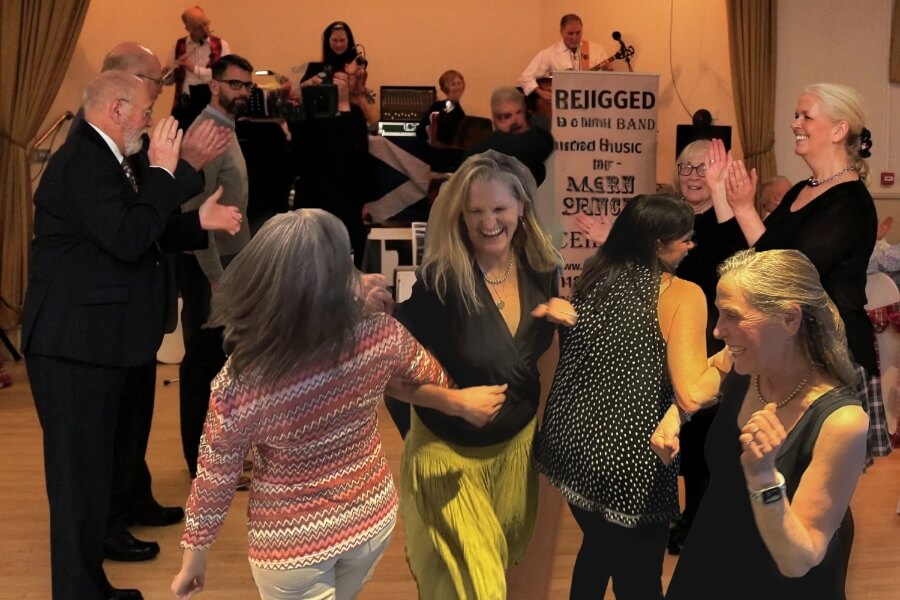
When in Scotland last year with a group, I was looking for a photo that conveyed the essence and beauty of the Highlands. I was on a post-dinner walk with several women (it doesn’t get dark there til 10 pm at that time of year), and I had them stop at different points around a bridge. All the shots are good, I think, but I ended up liking the middle one best. Yes, they’re posed—see point 6 below—but they’re relaxed, and I like the way they are strung out and the crenellations on the tower.
3. Go Easy on the Selfies

Sorry, but selfies can be sooooo repetitive. There’s your face, taking up most of the frame. Chances are you’ve got the same look (hopefully not duck lips or a peace-sign pose, but you know better than that) that you have in all your other shots—no matter what the background.
Chances are you’re making the same face that you are making in all your other shots—no matter what the background.
In all the photos we publish of our trips, I rarely pick a selfie, since the focus—on one person’s face—is off. Focus should be on the environment or some action. Check out the side-by-side photos shown here of Nextribers in a van on our Charleston, SC trip. I love me some Ellesor (one of our trip leaders), who is prominent in the left photo, but I would rather the main attention be on the exuberance of the other women farther back in the van.
Newsflash: You don’t have to be in every shot. If you’re traveling with friends, make them the stars at times, or get someone to take photos of you with your pals or by yourself—with the guidelines in this article in mind.
4. Get Closer
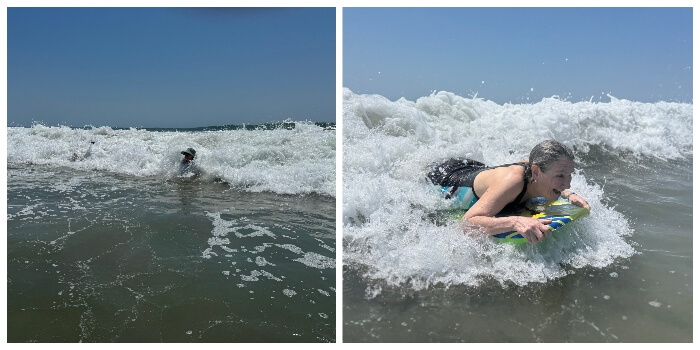
My ex taught many photo seminars, and this was always his number one piece of advice. When you’re close, the camera captures more emotion, more detail—adding immediacy and interest.
Above are great examples. A couple of weeks ago, I was at Playa Tronocones, Mexico with NextTribe, and we were having a blast in the surf. Through the eight years I’ve been taking women there, I’ve looked at lots of photos of people in the waves. Many, many of them are not that good because there’s no real connection with what’s going on.
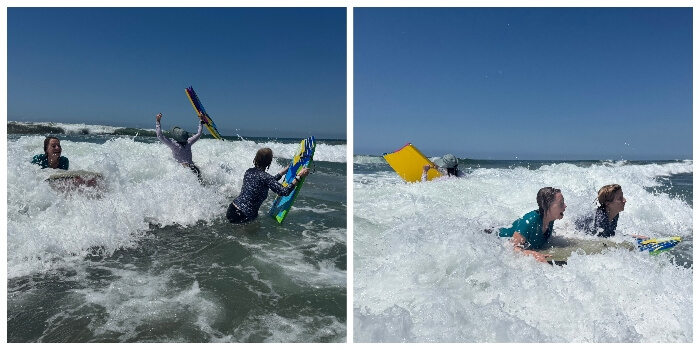
This year at the beach, I made the decision to somehow capture the joy and abandon we all feel when we’re in the ocean in Troncones. I had to dare the waves to get really close (and a few times my fingers got in the shot as I held the camera tightly). But I came out with many great shots that—better than any other shots I’ve taken—convey the thrill of a hearty surf.
My ex taught many photo seminars and this was always his number one piece of advice.
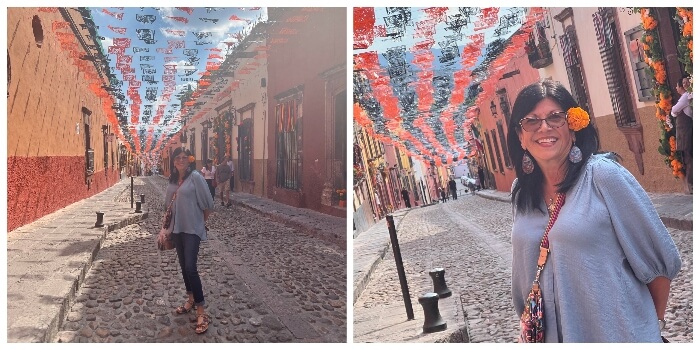
But even in more sedate settings, getting closer makes a difference. Below are two photos from San Miguel de Allende, Mexico, where we go every fall over Dia de los Muertos. The architecture is colonial, the streets are decorated with garlands of colorful paper. The shot on the right is fine, showing a beautiful woman—Teresa Ann—and the street behind her. But look at the difference going closer makes. We see more of her face—meaning a nice personal connection—and we get the back drop. Plus, I love the jaunty angle.
5. Corollary: Stay Away from the Zoom Lens
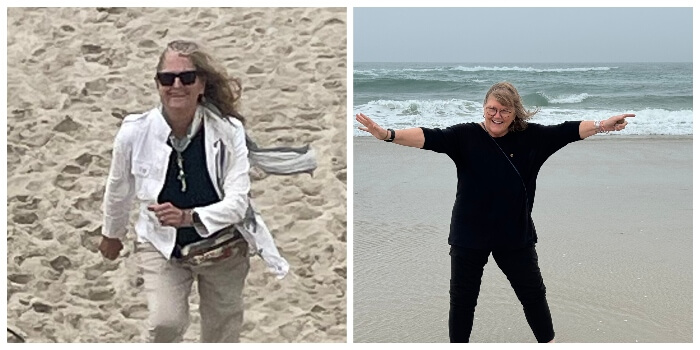
As good as technology is these days and despite all the ads for smartphones that tout the prowess of their camera lenses, using zoom is a poor substitute for getting closer.
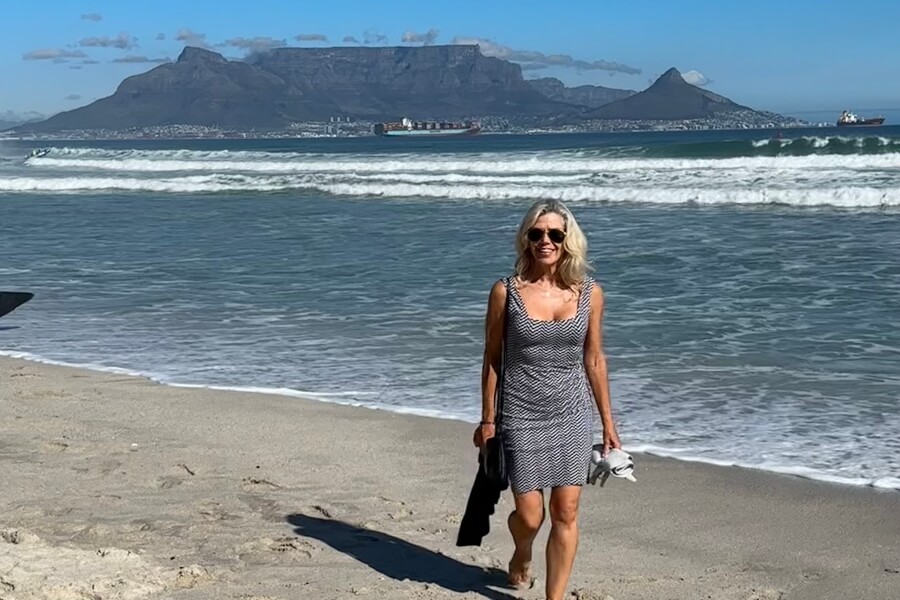
I have an Iphone 15, but still, if I zoom in on a person or place, it invariably looks grainy, flat and fuzzy around the edges of the subject . On a trip to Portugal, someone took the above shot of me running on the beach (left) from up on the boardwalk. I’m a pixelated mess! On the same day, I took the other shot of one of our travelers on the beach. It’s sharper and snappier. Most importantly, she looks like a human versus a figment of a robot’s imagination.
6. Avoid Overly Posed Shots
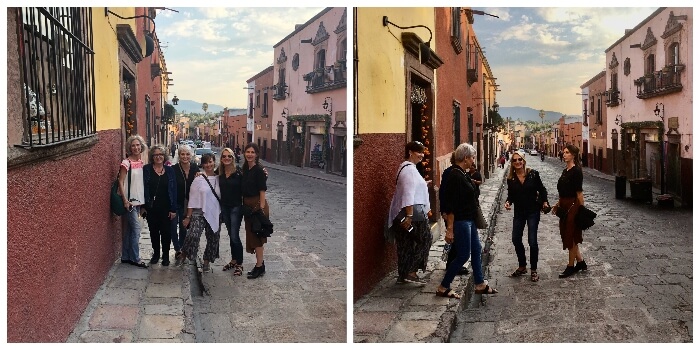
“OK, everyone, look over here”: Those are words that usually precede a photo. Once your pals hear them, they turn around, lock arms, and give their biggest smiles. Yeah, that’s fine, but we’ve seen those everywhere—faces can be almost interchangeable. It’s not bad to have them in your album, but they rarely elicit a reaction unless your viewer knows the people in the shot.
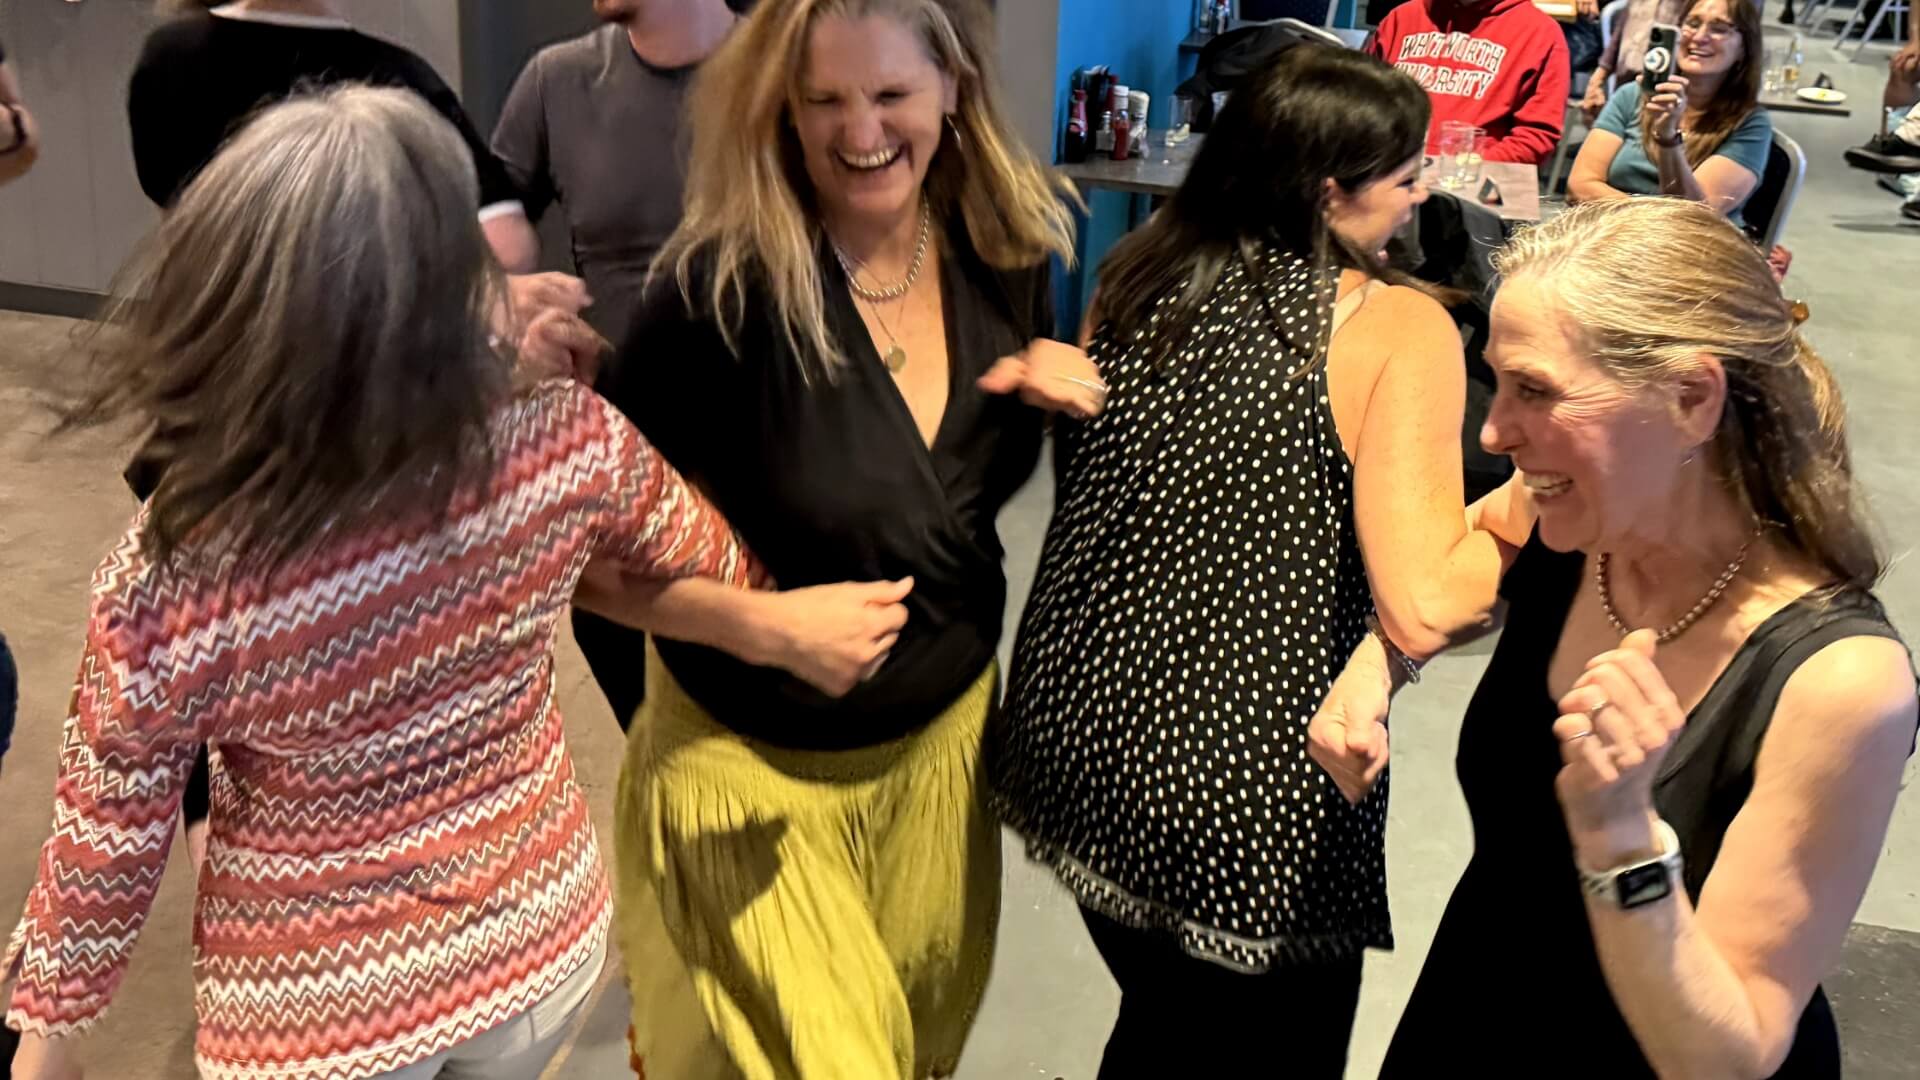
If you look at the two shots above, you can see that the one on the left is a posed shot on the streets of San Miguel de Allende, Mexico. It’s fine. But I much prefer the right one, when I captured the same group interacting on the street. They look like they’re having fun, with just one person looking directly at the camera. It gives a better sense of what it’s like to walk and play in that city.
7. Look for Action and Emotion

Continuing with this idea: Look for action and emotion, and pursue that. Nothing is more deadly than a shot of people standing around—above in a cooking class in Portugal. We’re all listening to the instructor, so we look bored, which of course makes the photo boring.
The shot of women tasting from the bowl activates memories and smiles.
Check out the other two examples from the same cooking class. One is funny because a woman has a piece of bread in her mouth, and the instructor is laughing (holding a knife, no less). The other—women tasting the fruit of their labor—is also humorous and brings us back to the days when we were kids and snuck a finger into the batter. It activates memories and smiles.
8. Populate Your Landscapes
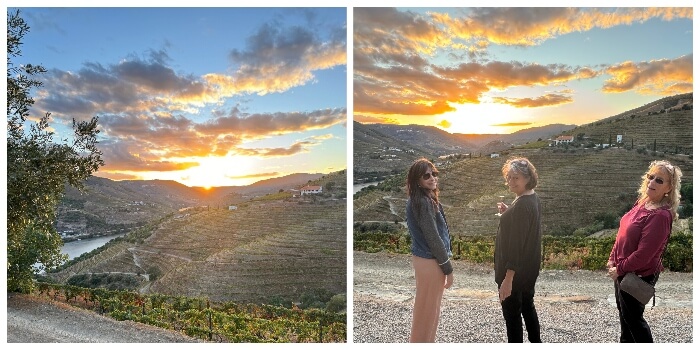
I take very few photos of landscapes–for a couple of reasons. 1. Even a professional photographer has trouble capturing a landscape on camera as it looks and feels in person. 2. There are postcards and stock agency photos that do a way better job with a landscape than any of us can do. When I take a landscape, I want a human element in the photo—to give it scale, make it unique and personal, and breathe life into the image.
Isn’t the excitement and awe for Portugal’s Douro Valley view heightened by the addition of three women who can’t seem to believe their good fortune at seeing it?
9. Stay Away from the Dreaded Table Shot
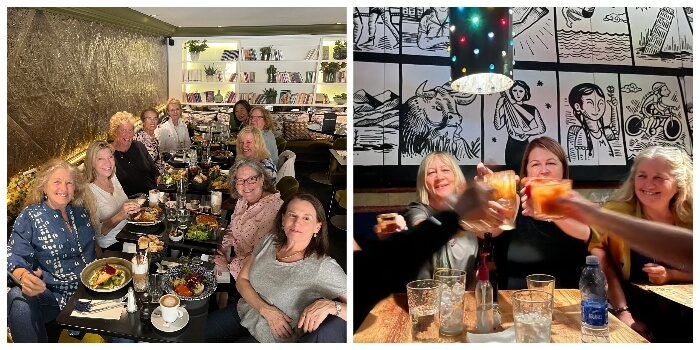
What vacation photos don’t include a group at a meal, staring at the camera—some of the subjects in mid-chew, or, worse still, with fork in mouth. If you’re going to take a table shot, make sure people are doing something interesting or laughing, or that there’s an interesting background. Otherwise, it’s deadly. On the left, you see a perfectly fine but not sensational photo from Paris (where most everything is sensational); on the right, the action and the background add so much to this shot from San Miguel de Allende, Mexico.
10. Get Rid of Clutter in the Background
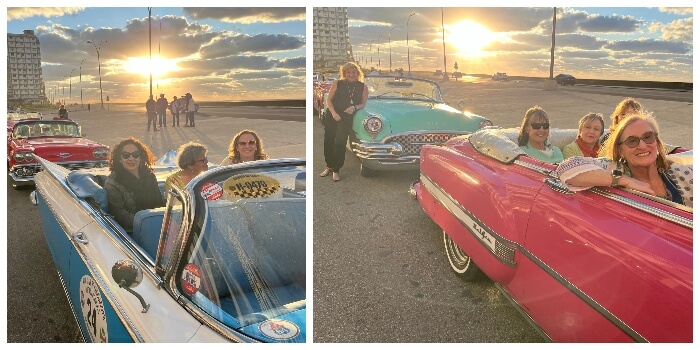
Too often I see photos that have an electrical box on the wall above someone’s head, backpacks down on the ground, or plastic water bottles in hand. Grrrrr!
Take a moment to get the distracting objects out of the frame, or wait for the people in the background to move along. If you have to think I’ll fix that “in post”—a saying that art directors are known to utter—then just stop. You probably won’t fix it afterward, and anyhow, it will take more time than just removing it at the moment.
If you have to think, I’ll fix that “in post,” then just stop.
In the example above, I was in Cuba trying to get a great shot of our travelers in the classic 1950s cars. In the first example, left, there were too many distracting people in the background that took away from the shot. So I moved to another car away from the people milling around. I asked one woman to stand by the car behind for perspective and to have something nice in the background.
11. No Backs Please (In General)
Say, you’re walking around a pretty town with your pals, you might want a shot that shows them in context. Instead of lazily raising your phone for a quick pic, get out in front of them for a photo of them walking toward you, but again they don’t need to be gawking at the camera. Have them be natural.
I adore the photo on the right, while our group was out exploring Porto, because I get such an immediate sense of how happy the woman in front is to be there.
Every once in a while a photo from the back is warranted. Specifically, when it emphasizes the connection between a person (or persons) with the environment or to allow the viewer to put themselves in the place of the person in the photo—giving them an angle on what the subject is seeing.
12. Don’t Be Afraid to Crop (or Obscure)
Go ahead, and shift focus in the camera or with editing tools. You don’t need everybody in every shot, and you usually have a lot of unnecessary ground at people’s feet. Also, I often crop out an unsmiling person in the photo. Focus on the good stuff.
Related: Not every photo has to have a full face or a full body. I’ve heard lots of people hesitate to crop out feet or tops of heads. There’s no problem with that; give it a whirl to heighten a photo’s impact.
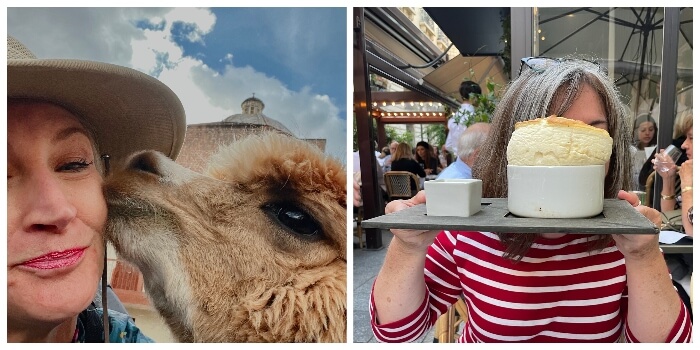
Even though we don’t see the woman’s face, this adorable shot, right, in Paris emphasizes the size and sumptuousness of a soufflé.
As you can see from the photo above, I sometimes crop out part of the face, such as the beautiful llama kiss, above left, in Cusco, Peru, or even hide the face, such as this adorable shot in Paris that emphasizes the size and sumptuousness of a soufflé. It’s OK. It’s the overall impact that you’re looking for.
13. Follow the Light

Photo right by Maria Weatherall
Along with “get closer,” this is the most important piece of advice. Why? Because it will instantly boost the quality of your photos. Make a point to take photos in the early morning or just before and after sundown. Photographers call the time after sunset “the golden hour” for good reason.
Along with “get closer,” this is the most important piece of advice.
Just look at the same woman, above, in the same outfit at different times of day in Playa Troncones, Mexico. She is gorgeous in both, but in the photo on the right, which takes full advantage of the light from the setting sun, she is absolutely radiant.
When the sun is low or just down, photos can take on a certain glow. You avoid the harsh shadows of midday, which make no one look good, by the way. Put your camera away when the sun is high. You really have to be a professional or awfully lucky to make a noon-day photo look good. This is probably the easiest-to-follow tip, so use it as your starting point for better photos all around.


0 Comments